A few weeks ago, Dropbox launched a set of new productivity tools including document scanning on iOS. This new feature allows users to scan documents with their smartphone camera and store those scans directly in their Dropbox. The feature automatically detects the document in the frame, extracts it from the background, fits it to a rectangular shape, removes shadows and adjusts the contrast, and finally saves it to a PDF file. For Dropbox Business users, we also run Optical Character Recognition (OCR) to recognize the text in the document for search and copy-pasting.
Beginning today, we will present a series of technical blog posts describing the computer vision and machine learning technologies that make Dropbox’s document scanning possible. In this post, we’ll focus on the first part of the pipeline: document detection.
Goal
Possible approaches
A common approach to solving problems like this is to train a deep neural network (DNN). DNNs are algorithms that take a large amount of labeled data and automatically learn to predict labels for new inputs. These have proved to be tremendously successful for a variety of computer vision applications, including image classification, image captioning, and face detection. However, DNNs are quite expensive, both in terms of computation time and memory usage. Therefore, they are usually difficult to deploy on mobile devices.
Another potential solution is to use Apple’s rectangle detection SDK, which provides an easy-to-use API that can identify rectangles in still images or video sequences in near-realtime. The algorithm works very well in simple scenes with a single prominent rectangle in a clean background, but is less accurate in more complicated scenes, such as capturing small receipts or business cards in cluttered backgrounds, which are essential use-cases for our scanning feature.
Our approach
We decided to develop a customized computer vision algorithm that relies on a series of well-studied fundamental components, rather than the “black box” of machine learning algorithms such as DNNs. The advantages of this approach are that it is easier to understand and debug, needs much less labeled training data, runs very fast and uses less memory at run time. It is also more accurate than Apple’s SDK for the kinds of usage scenarios we care about; in an A/B test evaluation, the detections found by our algorithm are 60% less likely to be manually corrected by users than those found by Apple’s API.
Our first observation is that documents are usually rectangular-shaped in physical space, and turn into convex quadrilaterals when projected onto 2D images. Therefore, our goal turns into finding the “best” quadrilateral from the image, and use that as our proxy for the document boundary. In order to find the quadrilateral, we need to find straight lines and their intersections. Finally, to find straight lines, we need to detect strong edges in the image. This gives us the outline of our detection algorithm, as shown below. We will discuss each component in more detail next.

Edge detection
Finding edges in an image is a classic problem in image processing and computer vision. It has decades of history, and saw early success already in the ’80s. One of the best known methods is the Canny edge detector, named after its inventor, John Canny. It dates back to 1986 but is still widely used today.
We applied the Canny Detector to our input image, as shown below, but the results were not very promising. The main problem is that the sections of text inside the document are strongly amplified, whereas the document edges—what we’re interested in—show up very weakly.
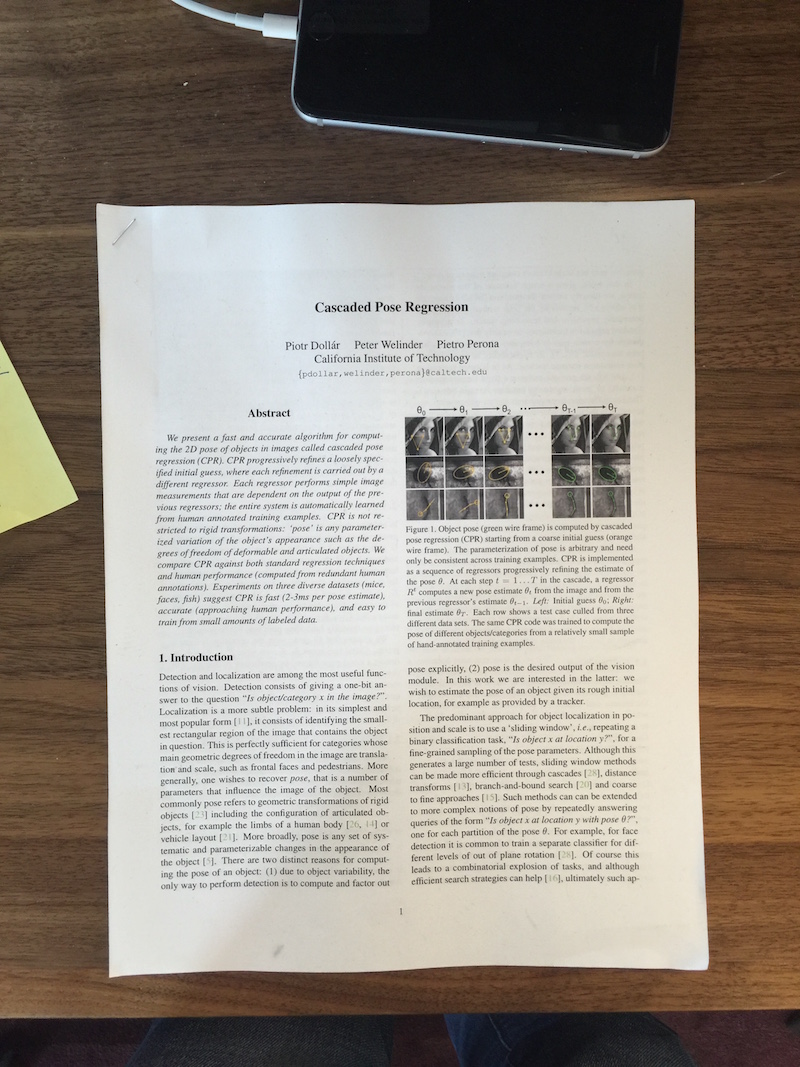
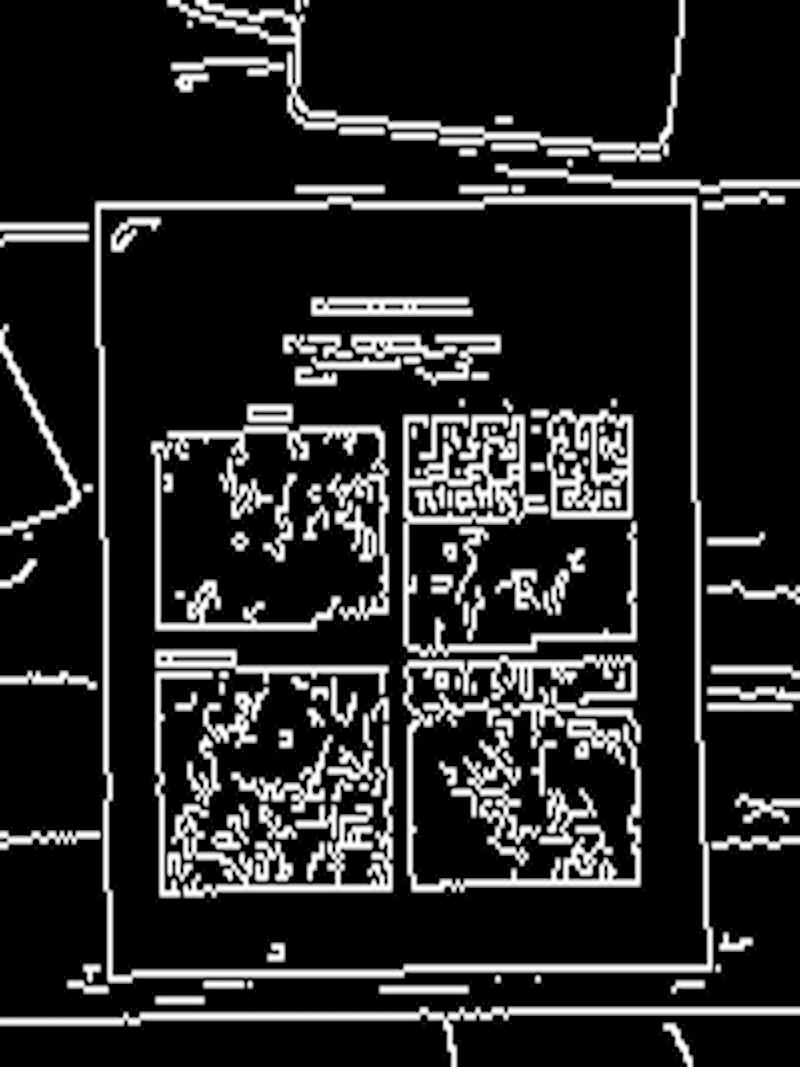
Left: the input image. Right: the output of the machine learning-based edge detector.
Hough transform
Once we have an accurate edge map, we’d like to find straight lines in it. For this, we use the venerable Hough transform, a technique that lets individual data points “vote” for likely solutions to a set of equations. In our case, each detected edge pixel votes for all lines passing through that point; the hope is that by adding up the votes across all edge pixels, the true document boundaries will emerge with the most votes.
More formally, here’s how it works: The slope-intercept form of a line is y = mx + b. If we detect an edge pixel at a particular (x,y) point, we want to vote for all lines that pass through the point. This corresponds to all slopes m and intercepts b that satisfy the line equation for that point. So we set up a “Hough Space” with m and b axes. Here, a single point (m,b) corresponds to a line in the original image; conversely, a point in the original image space corresponds to a line in the Hough Space. (This is called a duality in mathematics.) For every edge pixel in the original image, we increment a count for all corresponding points in the Hough Space. Finally, we simply look for the points with most votes in the Hough Space, and convert those back into lines in the original space.
In the figure below, you can see the detected edge pixels on the left and the corresponding Hough Space in the middle. We’ve circled the points with the most votes in the Hough Space, and then converted them back into lines (overlaid onto the original image) on the right. Note that although we described the Hough Transform above in terms of the slope-intercept form of a line, in practice we use a polar parameterization, r=x·sinθ+y·cosθ, that is more robust and easier to work with.
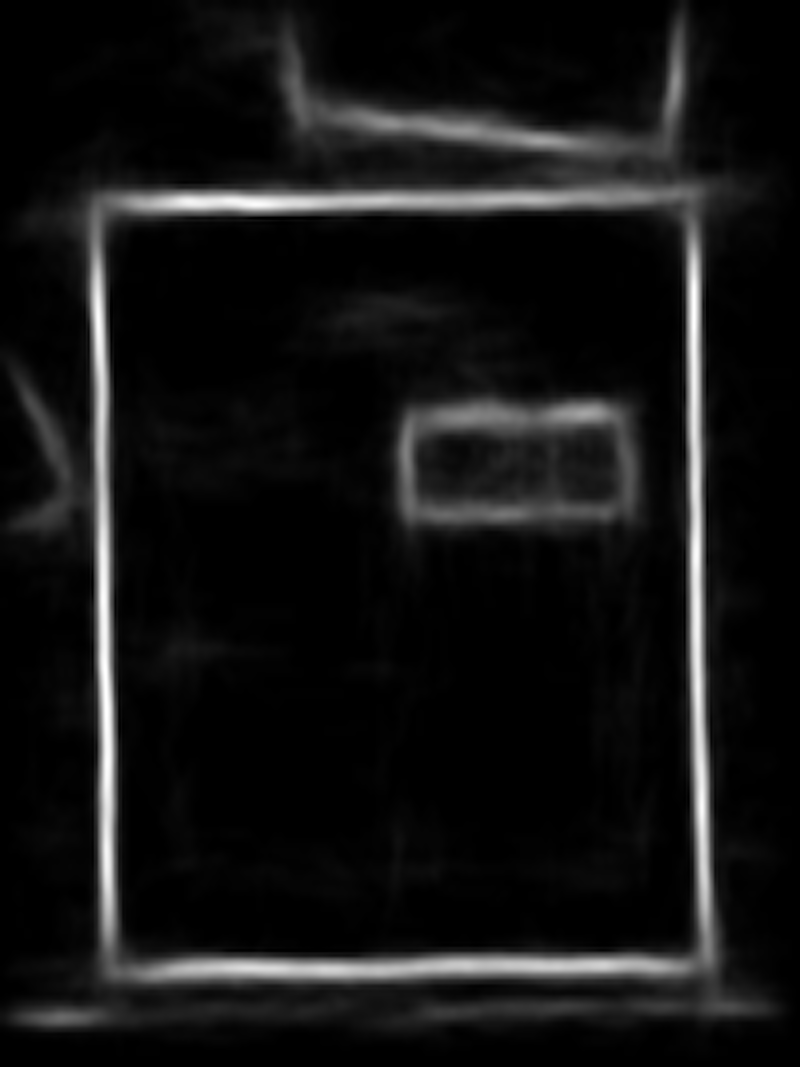
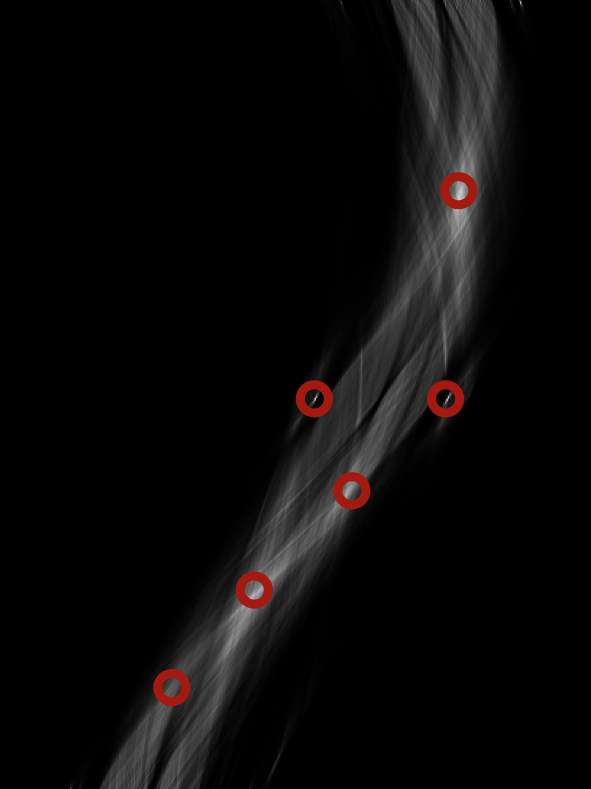
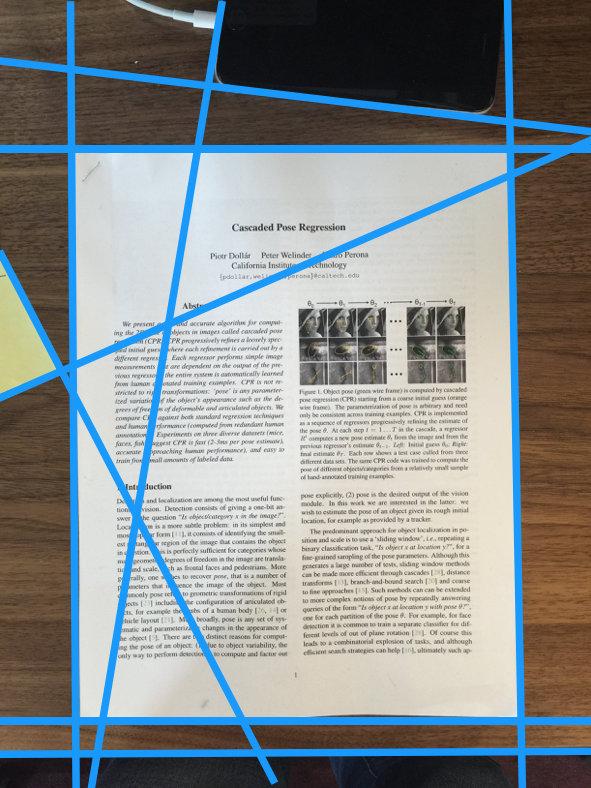
Left: detected edges. Middle: the Hough Transform of the edges, with local maxima marked in red. Right: the lines corresponding to the local maxima overlaid onto the original image.
Computing intersections and scoring quadrilaterals
After finding straight lines, the rest of the work is relatively simple. We compute the intersections between the lines as potential document corners, with some simple geometric constraints. For example, intersections with very acute angles are unlikely to be document corners. We next iterate through potential document corners, and enumerate all possible quadrilaterals, each of which is scored by adding up the probability predicted by the edge detector over pixels along its perimeter. The quadrilateral with highest score is output as the detected document.
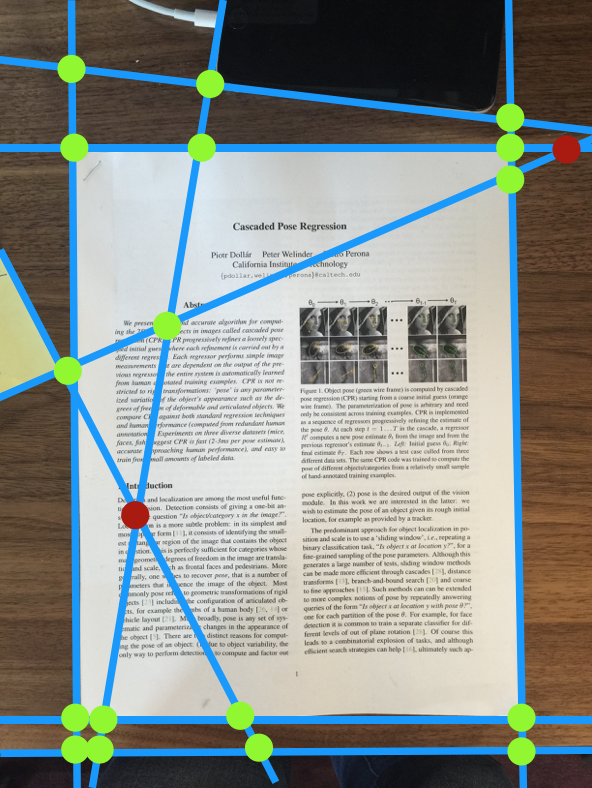
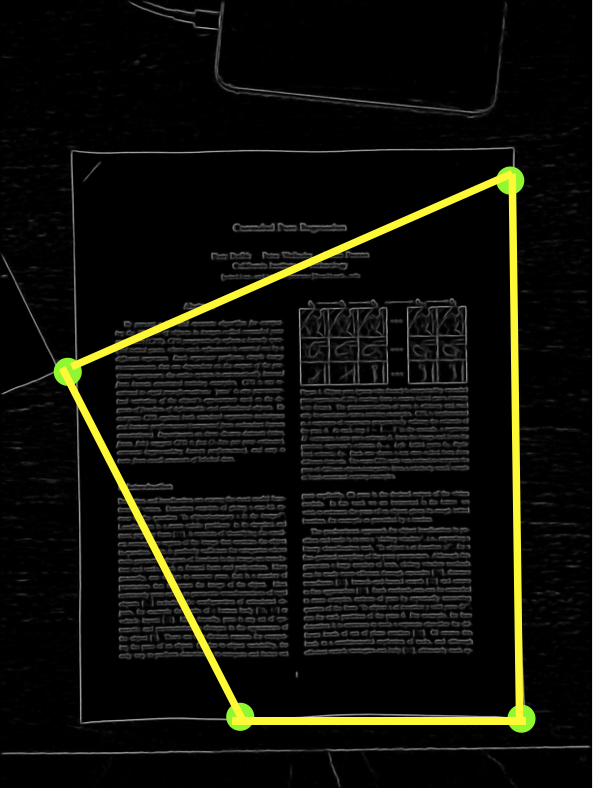
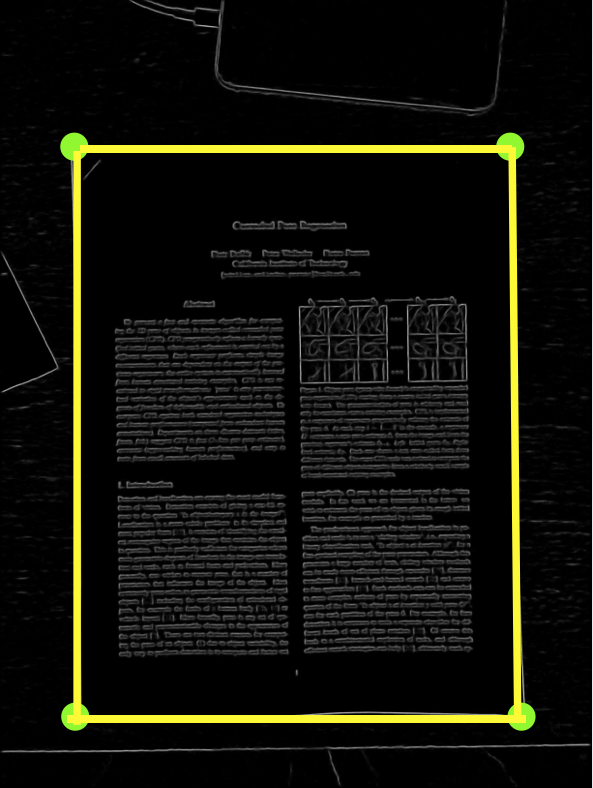
Left: intersections of detected lines are potential document corners, although the red ones are filtered out by using geometric constraints. Middle: one possible quadrilateral formed by the potential corners. Right: the quadrilateral with the highest score, which is the output of our algorithm.
Putting it all together
Finally, we show a video below demonstrating each step of the pipeline. The video is generated with a standalone iOS app we built to develop, visualize and debug our algorithm. The full pipeline runs near realtime at about 8–10 frames per second.

Try it out
Try out the Dropbox doc scanner today, and stay tuned for our next blog post, where we’ll describe how we turn the detected document outline into an enhanced rectangular image.


 Dropbox Dash: The AI teammate that understands your work